Mini Heart Cake with Chocolate Sponge
Highlighted under: Hearty Cooking
I love baking, especially when I can create something special like this Mini Heart Cake with Chocolate Sponge. The rich, decadent chocolate pairs perfectly with the airy texture of the sponge, making it an enjoyable treat for any occasion. This dessert isn’t just cute; it’s perfect for parties or a sweet surprise. Plus, I enjoy shaping the batter into heart forms that bring an extra touch of love to the celebration, making it feel personal and unique.
When I decided to make a Mini Heart Cake, I wanted to capture both flavor and aesthetics. My method of folding in the chocolate batter gently helps maintain that light sponge texture, crucial for this cake to rise beautifully. I found that using high-quality cocoa powder results in a richer flavor that complements the sweetness perfectly.
One tip I learned is to let the cakes cool completely before frosting; this prevents the frosting from melting off and creates a beautiful finish. After experimenting with different fillings, I chose whipped cream, which pairs so well with the sponge's chocolatey goodness. It truly is a labor of love!
Why You Will Love This Recipe
- Rich chocolate flavor paired with fresh orange zest
- Creamy texture that melts in your mouth
- Perfect for celebrations or as a sweet indulgence
Understanding the Chocolate Sponge
The chocolate sponge in this Mini Heart Cake is key to achieving a light, airy texture that contrasts beautifully with the rich frosting. The combination of all-purpose flour and unsweetened cocoa powder provides a tender crumb while ensuring a deep, chocolatey flavor. Make sure to sift the dry ingredients together to prevent lumps, and don't overmix; mixing until just combined is crucial for maintaining that fluffy texture.
The use of eggs and milk not only adds moisture but also contributes to the cake's structure. If you wish to make the cake lighter and more indulgent, using room temperature eggs can help create a better emulsion, which incorporates more air during the mixing process. This results in a sponge that rises nicely and bakes evenly, so always take a moment to let your eggs warm up before beginning.
Making the Perfect Whipped Cream Frosting
Whipped cream frosting is simple yet can be easily overwhipped, turning it into butter. To avoid this, start by whipping the heavy cream at a moderate speed until you see soft peaks forming. It's important to use heavy cream, as its fat content is essential for creating a stable structure that holds up the layers of your cake without collapsing.
Adding powdered sugar helps sweeten the frosting while also stabilizing it, giving it a lovely, glossy finish. If you're looking for a unique twist, consider incorporating a touch of orange zest or cocoa powder into the whipped cream. This not only heightens the flavor profile but can also add an attractive touch to the frosting's color and aroma, enhancing the overall appeal of your heart cake.
Ingredients
For the Chocolate Sponge
- 1 cup all-purpose flour
- 1/2 cup unsweetened cocoa powder
- 1 1/2 tsp baking powder
- 1/4 tsp salt
- 1/2 cup granulated sugar
- 2 large eggs
- 1/2 cup milk
- 1/4 cup vegetable oil
- 1 tsp vanilla extract
For the Whipped Cream Frosting
- 1 cup heavy cream
- 1/4 cup powdered sugar
- 1 tsp vanilla extract
Steps to Prepare
Prepare the Cake Batter
Preheat the oven to 350°F (175°C). In a mixing bowl, combine the flour, cocoa powder, baking powder, and salt. In another bowl, whisk together the sugar, eggs, milk, vegetable oil, and vanilla extract. Gradually add the dry ingredients to the wet ingredients, mixing until just combined.
Bake the Cakes
Grease heart-shaped cake molds. Pour the batter evenly into the molds and bake for 20-25 minutes or until a toothpick inserted comes out clean. Let the cakes cool completely in the molds before removing.
Make the Whipped Cream Frosting
In a chilled bowl, beat the heavy cream until it starts to thicken. Gradually add the powdered sugar and vanilla, continuing to whip until soft peaks form.
Assemble the Cake
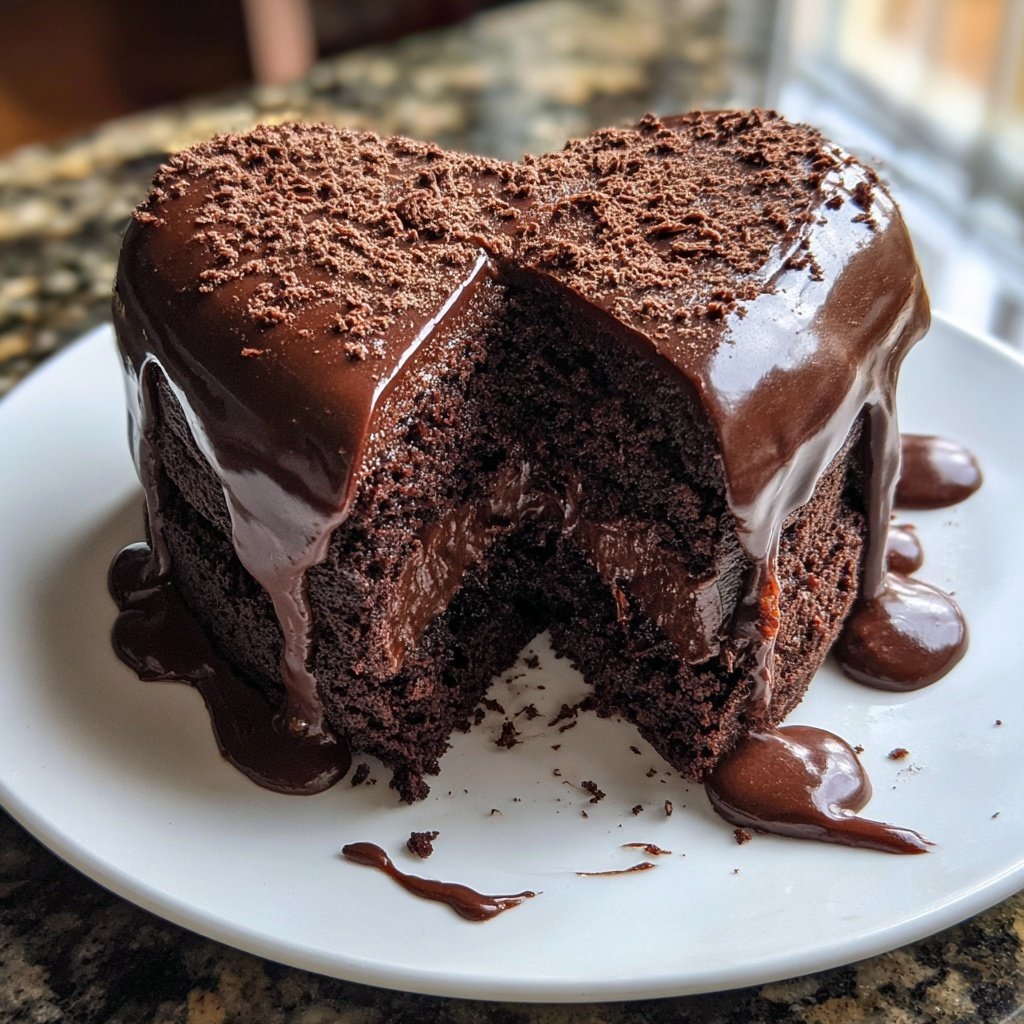
Once the cakes are cool, carefully remove them from the molds. Spread a layer of whipped cream on top of one cake, then place the second cake on top. Finish by frosting the top and sides of the cake with the remaining whipped cream.
Pro Tips
- For extra flavor, consider adding a layer of fruit preserves between the cakes before frosting. You can also decorate with chocolate shavings or fruits for a visually appealing finish.
Serving and Presentation Tips
When it comes to serving your Mini Heart Cake, think about adding fresh fruits like strawberries or raspberries on top of the frosting. These berries can complement the sweetness of the cake and provide a delightful tart contrast. Additionally, dusting some cocoa powder or powdered sugar over the frosting can create an elegant finish, visually enhancing the cake without complicating the flavor.
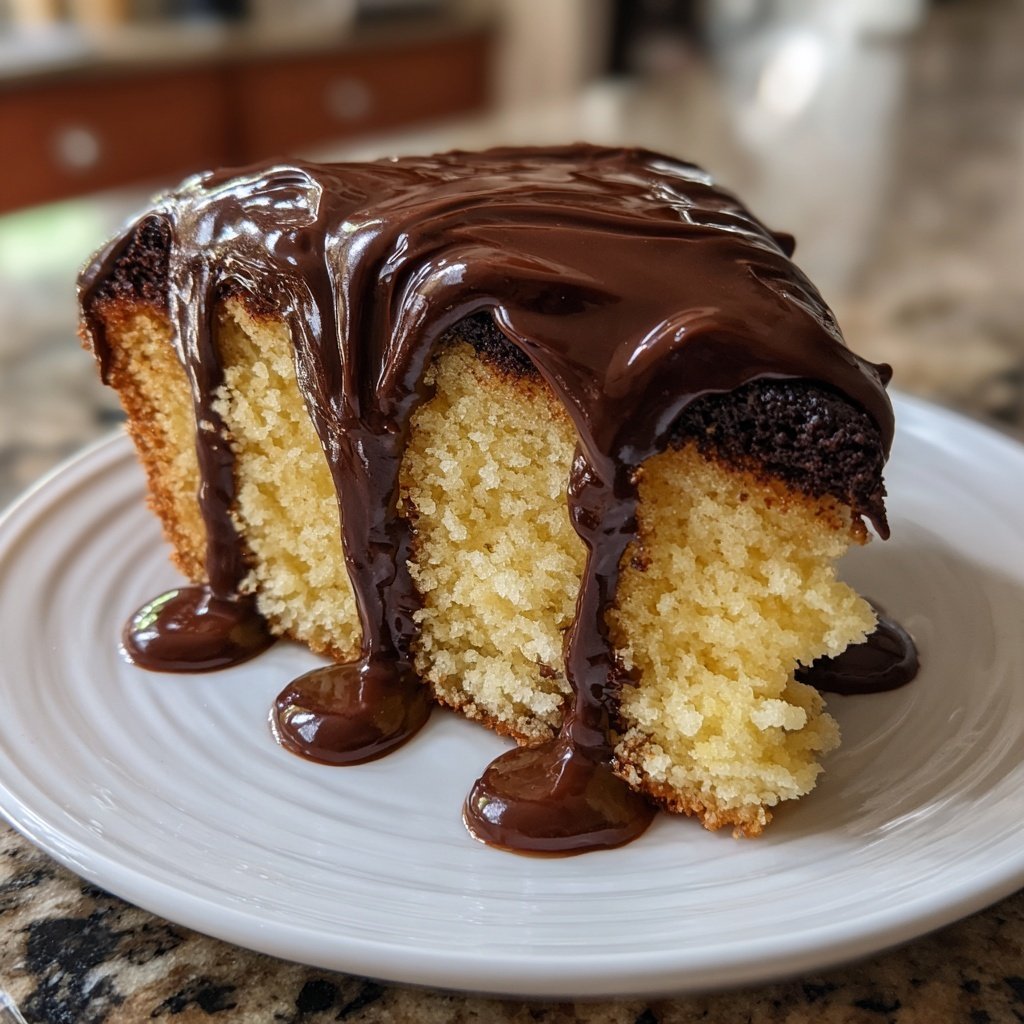
For a special touch, you might want to drizzle some warm chocolate ganache over the top after frosting. This adds an indulgent element and makes each slice even more appealing. If you're making this for a gathering, consider presenting the cakes on a beautiful cake stand, garnished with edible flowers for that extra flair.
Storage and Make-Ahead Tips
If you're planning to bake the Mini Heart Cake ahead of time, you can store the unfrosted sponges at room temperature for up to two days. Just make sure to wrap them tightly in plastic wrap to keep them moist. Alternatively, they can be frozen for up to a month. For freezing, wrap them in plastic wrap and then in aluminum foil to prevent freezer burn and ensure the best flavor when you’re ready to serve.
When you're ready to frost the cake, just let it thaw completely. Prepare the whipped cream frosting fresh, as it holds its form best when made shortly before serving. If you're not in a rush, allow the frosted cake to chill for about 30 minutes in the fridge—this helps set the whipped cream and makes slicing cleaner, creating a beautifully presented dessert.
Questions About Recipes
→ Can I use a different shape for the cakes?
Absolutely! You can use round or any other shaped pans. Just adjust the baking time as needed.
→ How should I store the leftover cake?
Store any leftover cake in an airtight container in the refrigerator for up to 3 days.
→ Can I make this cake gluten-free?
Yes, you can substitute the all-purpose flour with a gluten-free flour blend for a delicious option.
→ What can I use instead of heavy cream for the frosting?
You may use coconut cream or a dairy-free whipping cream alternative if you prefer a dairy-free option.
Mini Heart Cake with Chocolate Sponge
Created by: Nerissa Caldwell
Recipe Type: Hearty Cooking
Skill Level: Intermediate
Final Quantity: 4 servings
What You'll Need
For the Chocolate Sponge
- 1 cup all-purpose flour
- 1/2 cup unsweetened cocoa powder
- 1 1/2 tsp baking powder
- 1/4 tsp salt
- 1/2 cup granulated sugar
- 2 large eggs
- 1/2 cup milk
- 1/4 cup vegetable oil
- 1 tsp vanilla extract
For the Whipped Cream Frosting
- 1 cup heavy cream
- 1/4 cup powdered sugar
- 1 tsp vanilla extract
How-To Steps
Preheat the oven to 350°F (175°C). In a mixing bowl, combine the flour, cocoa powder, baking powder, and salt. In another bowl, whisk together the sugar, eggs, milk, vegetable oil, and vanilla extract. Gradually add the dry ingredients to the wet ingredients, mixing until just combined.
Grease heart-shaped cake molds. Pour the batter evenly into the molds and bake for 20-25 minutes or until a toothpick inserted comes out clean. Let the cakes cool completely in the molds before removing.
In a chilled bowl, beat the heavy cream until it starts to thicken. Gradually add the powdered sugar and vanilla, continuing to whip until soft peaks form.
Once the cakes are cool, carefully remove them from the molds. Spread a layer of whipped cream on top of one cake, then place the second cake on top. Finish by frosting the top and sides of the cake with the remaining whipped cream.
Extra Tips
- For extra flavor, consider adding a layer of fruit preserves between the cakes before frosting. You can also decorate with chocolate shavings or fruits for a visually appealing finish.
Nutritional Breakdown (Per Serving)
- Calories: 380 kcal
- Total Fat: 26g
- Saturated Fat: 15g
- Cholesterol: 195mg
- Sodium: 85mg
- Total Carbohydrates: 32g
- Dietary Fiber: 3g
- Sugars: 24g
- Protein: 6g